When working with documents, presentations, or design projects, having a ruler or a guide to measure and align elements is essential for precision and aesthetics. Inserting a ruler can be achieved in various ways depending on the software or tool you are using. Here are five common methods to insert a ruler in different contexts.
Microsoft Word and Other Word Processing Software

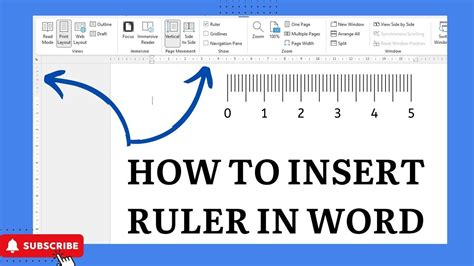
In Microsoft Word and similar word processing applications, the ruler is typically already available at the top of the document window. However, if it’s not visible, you can easily enable it. To insert or show the ruler in Microsoft Word, follow these steps:
- Go to the “View” tab on the Ribbon.
- Check the “Ruler” checkbox in the “Show” group. This will toggle the visibility of the ruler.
This action will display the horizontal and vertical rulers, allowing you to accurately position and align text, images, and other elements within your document.
Customizing the Ruler
Beyond just displaying the ruler, you can also customize its units and other settings to better suit your needs. For example, you might want to change the measurement units from inches to centimeters or pixels, depending on the nature of your project.
To do this in Microsoft Word:
- Go to the “File” tab and select “Options” (or “Preferences” in some versions).
- In the Word Options window, navigate to the “Advanced” category.
- Scroll down to the “Display” section and click on the “Ruler Units” dropdown menu to select your preferred unit of measurement.
Google Docs

In Google Docs, the process to show the ruler is similar to Microsoft Word but with slight differences due to the web-based interface. To insert or show the ruler in Google Docs:
- Open your Google Doc.
- Click on the “View” menu at the top.
- Select “Show ruler” from the dropdown menu. This will toggle the visibility of the ruler at the top of your document.
Utilizing the Ruler in Google Docs
Once the ruler is visible, you can use it to adjust margins, set tab stops, and align text and objects with precision. The ruler in Google Docs is particularly useful for creating documents that require specific formatting, such as resumes, reports, and academic papers.
Adobe Photoshop and Graphic Design Software
In graphic design and image editing software like Adobe Photoshop, rulers serve a slightly different purpose. They are crucial for precise measurements and alignments in a visual context. To show the rulers in Adobe Photoshop:
- Go to the “View” menu.
- Select “Rulers” or press Ctrl+R (Windows) or Command+R (Mac) to toggle the rulers on and off.
Having the rulers visible allows designers to work with exact dimensions, which is essential for professional graphic design and digital art projects.
Customizing Rulers in Adobe Photoshop
Similar to word processing software, Adobe Photoshop also allows you to customize the units of measurement for the rulers. This can be particularly useful when working on projects that require specific dimensions or when collaborating with others who use different units of measurement.
To change the ruler units in Photoshop:
- Go to “Edit” > “Preferences” > “Units & Rulers” (or “Preferences” > “Units” in some versions).
- In the Units & Rulers preferences window, you can select the desired unit of measurement for the rulers from the dropdown menu.
Microsoft PowerPoint and Presentation Software
In presentation software like Microsoft PowerPoint, the ruler can be useful for aligning objects, setting precise margins, and ensuring that your slides have a professional and balanced look. To show the ruler in PowerPoint:
- Click on the “View” tab on the Ribbon.
- Check the “Ruler” checkbox in the “Show” group. This will display the ruler along the top and left side of the slide area.
The ruler in PowerPoint is especially handy for precise placement of shapes, images, and text boxes, helping you to create visually appealing and well-structured slides.
Using Guides in PowerPoint
Beyond the ruler, PowerPoint also offers guide features that can be used in conjunction with the ruler for even more precise control over object placement and alignment. To use guides:
- Go to the “View” tab.
- Check the “Guides” checkbox. You can then drag guides from the ruler onto your slide to help position elements.
Key Points
- The ruler can be toggled on and off in most software applications for precise measurements and alignments.
- Customization options for rulers, such as changing units of measurement, are available in many applications.
- Guides can be used in conjunction with rulers for more precise placement of elements in graphic design and presentation software.
- Utilizing rulers and guides can significantly enhance the professionalism and aesthetic appeal of documents, presentations, and design projects.
- Practicing with different software and tools can help in understanding the full potential and application of rulers in various contexts.
Understanding how to insert and utilize rulers across different software applications can greatly enhance your productivity and the quality of your work. Whether you're working on documents, presentations, or graphic design projects, mastering the use of rulers and guides can make a significant difference in achieving professional results.
What is the purpose of the ruler in software applications?
+The ruler in software applications, such as word processors, graphic design tools, and presentation software, serves as a guide for precise measurements and alignments. It helps users to accurately position text, images, and other elements within their documents or projects.
How do I change the units of measurement for the ruler in Microsoft Word?
+To change the units of measurement for the ruler in Microsoft Word, navigate to the "File" tab, select "Options," then go to the "Advanced" category, and find the "Display" section where you can choose your preferred unit of measurement from the "Ruler Units" dropdown menu.
Can I use guides in conjunction with the ruler in PowerPoint?
+Yes, PowerPoint allows you to use guides in conjunction with the ruler. By checking the "Guides" checkbox under the "View" tab, you can drag guides from the ruler onto your slide to help position elements more precisely.
As you explore the capabilities of rulers and guides across various software applications, you’ll find that these tools not only enhance your productivity but also play a critical role in ensuring the professionalism and visual appeal of your work. Whether you’re a seasoned professional or just starting out, mastering the use of these features can make a significant difference in the quality of your projects.